Tips: 1. When you attempt this during winter, be careful with snow. Watch the weather if there is snowfall before on your hiking date. 2. Prepare winter gears, snowshoe, microspike, crampon, long gaiters, water proof clothing, sunglass, weather resistant gloves or mitt.
I underestimated the seriousness of snow, and did not prepared winter gears well. I did not finished to summit, and needed to turn back less than a midpoint. The trails are all disappeared because of snow, and I depends on my hiking apps on my phone.
I was arrived parking lot around 9:00 am, and there is just one car there.
Parking
The trailhead sign is covered by snow.
Trailhead
You can find any trail except the foot steps.
Trail
There is ski traces in some sections, and it made me so difficult where to go.
Ski traces
It is seriously getting deeper, and I almost felt walking in swamp with the depth of my waist in some sections.
Trail with lots of snow
I had to turn back because I don’t have snowshoe and gaiters long enough to protect my feet.
Duration: 5 hours ( 2:38 up, 2:20 down), excluding 30 minutes break in Samgakbon, 20 minutes break at the top.
Elevation gain: 1370 m
Trailhead: Gwaneumsa
This is one of my todo list a long time ago, because it is the highest point in South Korea. There are two main routes to the top, Gwaneumsa and Seongpanak courses. Gwaneumsa course is shorter and more elevation gain, which means it is harder than Seongpanak course. So, I decided to take Gwaneumsa trail on way up, and take Seongpanak trail on way down.
The trailhead is as normal as other trail, and there are well informed signs every mile or half mile. It was easy to follow.
The first 1/3 ( green line on the sign) is relatively easy, not much elevation gain.
The last 2/3 has a lot stairs and steep, and you will need good shape to get through this route. Also, there is time limit at the Samgakbong Shelter, and you need to pass this point by 12:30 pm in order to go the top. Otherwise you will be blocked by park staff for the safety. This is shortening 30 minutes during winter and lengtheing 30 minutes during summer.
This is Samgakbong, and Samgakbong shelter. There is sign that shows prohibited time.
There is water fountains before Yongjingak Hyunsugyo, but it is not clear it can be edible.
Finally, I am at the Baengnokdam, and it was so many people waiting to take picture even though the weather is not favorable. Also there is a sign to descend by 14:00.
After a short hike to Kwaay Paay peak, I was looking some place for quick work out. Recently, I am obsessed with body weight work out. On way to the home, I stopped by Murray Ridge Park. It is not a big, but there is pull up bar, parallel bar and abs bench.
There is three pull up bars with different height. The area is shaded in the morning, which is good to work out. The parallel bar is a kind of wide. The grass is well maintained.
I was able to do 6 strict pull ups on the highest bar, and it is harder compare to the gym.
This is very short hike that travels to Kwaay Paay Peak from Kumeyaay Lake Campground.
Distance: 3 miles
Duration: 1:28:00
Pace: 29.19 min/mile
Elevation Gain: 853 ft
Trailhead: Bushy Hill Dr at Father Junipero Serra Trail ( It is across Kumeyaay Lake Campground)
At the intersection of Father Junipero Serra Trail and Bushy Hill Dr, there is a parking lot on the left, and Kumeyaay Lake Campground on the right. If the parking lot is full, you can park on Father Junipero Serra Trail, just outside of the gate. Remember the gate locked at night, if you plan to hike late afternoon. Follow Father Junipero Serra Trail about 0.2 miles, you will see the sign of Kwaay Paay Peak Trail, and 1.2 miles from here.
Soon, there is a junction, either way will merge into the same place, the left turn is little longer. I just take right turn.
About 0.45 miles, these two way meet, and continue to the straight at here.
In a minute, there is another junction, which meet the trail from Mission Dam, here continue staight.
About a quarter miles, there is a sign to the peak 0.8 miles to go. Even though it is short trail, it is pretty steep most of the section. Enjoy the view at the peak, and return the same way.
This is the longest way to travel cowles and pyles peak at one attempt.
Distance: 8 miles
Duration: 3:19:00
Pace: 24.01 min/mile
Elevation Gain: 1913 ft
Trailhead: Mesa blvd at Prospect Ave
To get the trailhead, you can either park at the end of Arlette St, or on the side of Mesa Blvd which is close to the actual trailhead. The trailhead sign is obviously shown on your right, and from here to Cowles mountain is 2.46 miles. Then you will pass tennis court on your right and stoney bridge ( maybe not the bridge, see the picture below ). About a half mile, you’ve got another trail sign that shows 2 miles to go.
It is mostly single and switchback style trail, and go straight on the junction that meet with Mesa Trail. On its way, there is long wood that was installed on the side of trail. It is a good stopping point you get take a short rest.
At 1.5 miles, you met with wide service road, and turn right to head Cowles Mountain. From here, you will meet a lot of people who came from Barker Way Trailhead. You can’t get lost from here, and always follow the road that is wide and many people around you.
At 2.5 miles, we reached Cowles mountain and enjoy the view. And then head to the other side, and there is the start of Pyles peak trail. There is up and downs to the Pyles peak, and it is well maintained and easy to follow.
At 4 miles, we reached the Pyles peak and return the same way we came.
Before I attempted this hike, I was told it is very challenging and a lot of elevation gain and loss when going out as well as coming back. I read a lot of articles about this trail and get prepared. I set the date and the weather forecast were favorable for this hike. Even on the date I hiked, the weather was much better. It was cloudy and little bit of light rain when I start, but it stopped as we go up. There was trail mark on every mile and additionally on 3.5 mile. It was very easy to follow and the elevation profile on the mark was impressive, because I did not see this kind of trail sign before.
The parking lot opens at 8:00 am, and we arrived there at 6:30 am. So we parked our car on the side of the street, and start our journey. After passing a couple of private ranches, we were at the trailhead with restroom.
About 1 mile, there is T junction where you take left turn. Soon there is a mile marker, then there is a junction (Pata Ranch Trail) where we take left and continue El Capitian Trail.
When you pass the 3 mile marker and bench, there is stop sign and it said “You just finished easy half of the trail”. I guess there will be a lot of of uphill waiting for us.
I was very good shape, and I wasn’t feeling that hard at this point. Before you reach 5 mile marker, there is old jeep truck which is good spot to take a picture. Also, we feel it gets close to the peak.
At 5 miles, there is four way junction. Go straight will lead to the cliff, and we take a left turn continue to El Cajon Mountain peak. From here, the trail gets narrow and there were a lot of vegetation and you will want to wear long pants not getting scratch on your leg.
Finally, we summit El Cajon peak, and enjoy the spectacular view. After brief rest, we came back to the four way junction, we go the other side which is about 0.3 miles to the right at junction. There is not much except old building structure. We came back to the junction again, and came back the the parking lot.
The downhills when we go out became a uphill when we came back. Total elevation gain is 4000 ft, but I don’t feel it is as hard as Mt baldy and other peaks in San Gabriel range, because elevation is much lower. It is great work out and very rewarding hike, and not that crowded, nor loneliness. You will meet many people when you travel this trail.
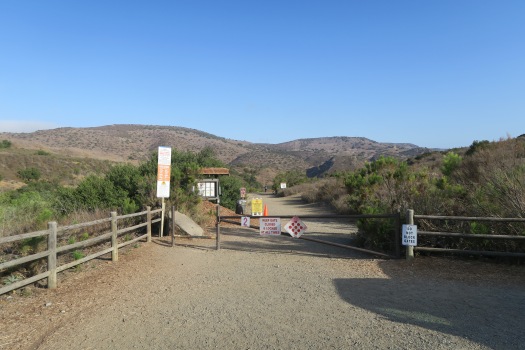
Trailhead: Jackson Dr and Mission Gorge Rd Staging area
Initially, I plan to hike South Fortuna Mountain, and I ended up with both South and North Fortuna Mountains because of their proximity. The trailhead is at Jackson Dr and Mission Gorge Rd, and there is staging area where you can park your car. From there, take wide path toward River crossings.
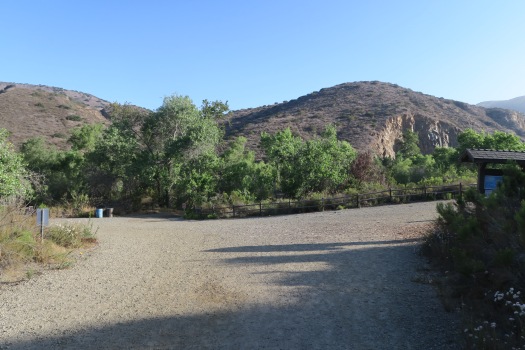
About 0.3 miles from start, there is a junction and take a left here. Right turn here will lead to Visitor Center, which I went initially but I realize it is wrong way and I come back this junction again.
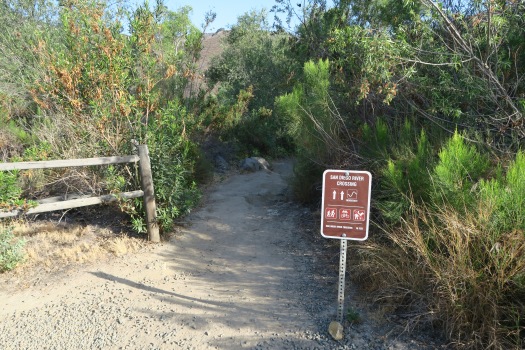
On San Diego River Crossing trail, you will encounter river crossing and you will get wet if the water stream is high. There is around way on your left with sign, and take that route without soaking your shoe.
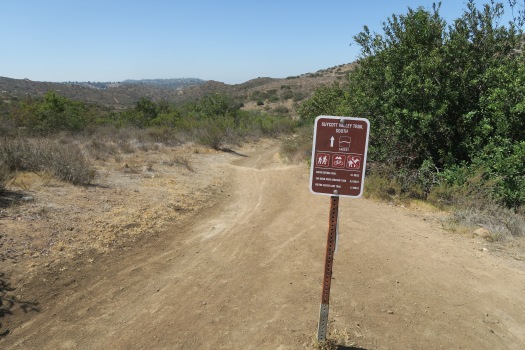
Then follow San Diego River Crossing Trail until you met the junction with Suycott Valley Trail. Turn right on that junction and follow Suycott Valley Trail about 0.3 miles.
San Diego River Crossing Trail
San Diego River Crossing Trail Sign
On next junction, turn right and turn right onto South Fortuna Trail. From here South Fortuna summit is about 1.2 miles, and trail sign said it is difficult with decent amount of elevation gain.
Junction Suycott Wash Service Road and South Fortuna Trail
South Fortuna Trail Sign
There is wooden bridge on the way, and another trail sign where I took right turn.
wooden bridge
South Fortuna Trail Sign
Here is a picture seen from below toward South Fortuna Mountain, and the right picture is a rock on the way.
South Fortuna Summit from down
The rock on the way
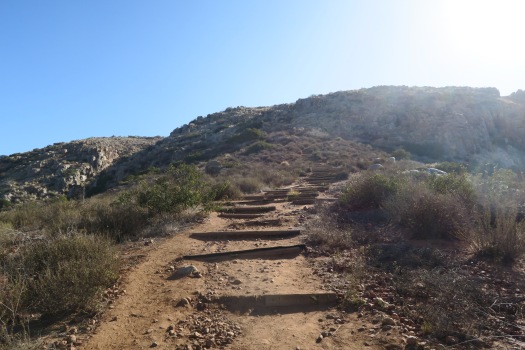
This is popular stair way called “Stairway to Heaven”, which is about 560 feet vertical gain.
There are a couple of signs on the way, and finally I went to the summit.
0.4 milles to South Fortuna Summit
Almost Summit
North Fortuna from South Fortuna
From the saddle, there is four way junction. Straight ahead to North Fortuna Summit. Turn left is where we will get down when we came back here again after North Fortuna Summit.
Junction that lead to North Fortuna Mountain
More close look toward North Fortuna Mountain
North Fortuna Trail Sign
This is not North Fortuna Summit
Here is North Fortuna Summit, which is little higher than South Fortuna.
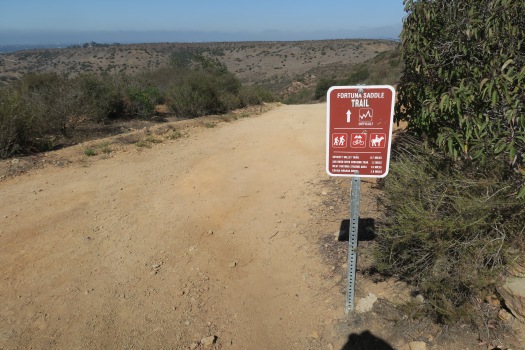
Go back to the 4 way junction, and turn right toward Fortuna Saddle Trail. This is very steep downhill, and you better use hiking pole to get down this trail.
Follow this trail about 0.7 miles until you see Suycott Valley Trail sign.
Fortuna Saddle Trail West
Go straight
Turn left toward Suycott Valley Trail.
Go straight toward the junction that met when we came.
From here, we follow the way we came toward parking lot.
About 0.4 miles from the trailhead, there is a junction that split Ellie Lane Trail and Wile horse Trail. Take left turn and continue to Ellie Lane Trail. About 1.1 miles, we are at a large granite and faced with Table Rock. You will realize it is Table Rock without any sign. After that there are a couple of junctions with no signs, and it will end up with same place. We take left at the first of them, then turn right, turn right. At about 2 miles, there was a T junction, and we should take a left path to continue Ellie Lane Trail. If you take a right turn here, you will be going to the parking lot. The trail peaks and went downward a bit, then we see small junction. There are two small peaks in a series, not sure that is Ramona Overlook. We went there and come back to the trail get continue on the trail. At 3.35 miles, we came to the junction that leads to the iron mountain peak. The right turn here will be going to iron mountain trail trailhead, which is the way later we get down. It is about 1.45 miles to the peak, it is continuous up hill, but it isn’t that difficult to go. Also, there are so many people on the trail, there is no chance you get lost.
Once we peaked iron mountain and get down the same way to the Junction, and take a left to go iron mountain trail. Before we get to iron mountain trailhead, there was a T junction where we take a right turn that leads to Wild Horse Trail. At the first junction, take a left to go north, then turn right at the next junction with no sign. It was very nice trail and a lot of variations.
Ellie Lane Trailhead
First Junction
Way Ellie Lane Trail
Ellie Lane Trail sign
Table Rock
First Junction after Table Rock
Junction that meet Ellie Land and Wild horse trail
Take a left to Ellie Lane Trail
Junction that lead to Ramona Overlook
View from Ramona Overlook
Ramona Overlook
Junction that meet Ellie Lane and iron mountain trail
Iron Mountain peak
Junction that meet iron mountain trail and wild horse trail
Take a left in this junction
Take a right here
Last junction that lead to the parking lot ( take left)
On the way to Ellie Lane Trailhead
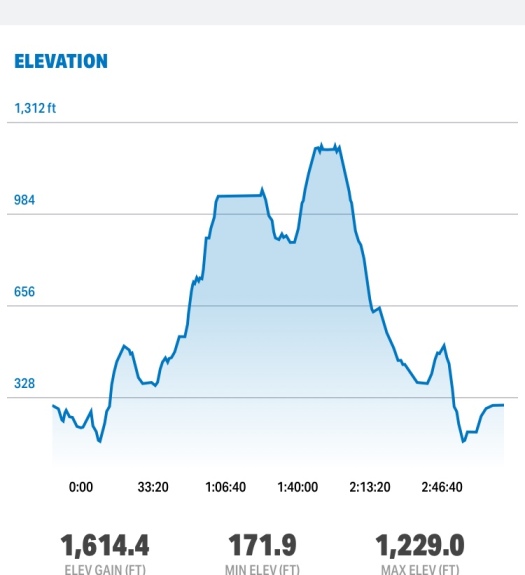
Elevation profile
Second visit: I did another hike with some companies in the following week. It was raining when we start, but I am sure it will stop as we go up. It is much comfortable for me because I know where to go. One of friends told me that there are a lot of rock formation here, and I just realized it is at this time.